Project forking workflow
Whenever possible, it’s recommended to work in a common Git repository and use branching strategies to manage your work. However, if you do not have write access for the repository you want to contribute to, you can create a fork.
A fork is a personal copy of the repository and all its branches, which you create in a namespace of your choice. This way you can make changes in your own fork and submit them through a merge request to the repository you don’t have access to.
Creating a fork
-
Introduced a new form in GitLab 13.11 with a flag named
fork_project_form. Disabled by default. -
Enabled on GitLab.com and self-managed in GitLab 14.8. Feature flag
fork_project_formremoved.
To fork an existing project in GitLab:
- On the project’s home page, in the upper right, select Fork:

- Optional. Edit the Project name.
- For Project URL, select the namespace your fork should belong to.
- Add a Project slug. This value becomes part of the URL to your fork. It must be unique in the namespace.
- Optional. Add a Project description.
- Select the Visibility level for your fork. For more information about visibility levels, read Project and group visibility.
- Select Fork project.
GitLab creates your fork, and redirects you to the new fork’s page.
Update your fork
To copy the latest changes from the upstream repository into your fork, update it from the command line. GitLab Premium and higher tiers can also configure forks as pull mirrors of the upstream repository.
From the command line
To update your fork from the command line, first ensure that you have configured
an upstream remote repository for your fork:
- Clone your fork locally, if you have not already done so. For more information, see Clone a repository.
- View the remotes configured for your fork with
git remote -v. -
If your fork does not have an
upstreamremote pointing to the original repository, use one of these examples to configure anupstreamremote:# Use this line to set any repository as your upstream after editing <upstream_url> git remote add upstream <upstream_url> # Use this line to set the main GitLab repository as your upstream git remote add upstream https://gitlab.com/gitlab-org/gitlab.gitAfter ensuring your fork has an
upstreamremote configured, you are ready to update your fork. -
In your local copy, ensure you have checked out the default branch, replacing
mainwith the name of your default branch:git checkout mainIf Git identifies unstaged changes, commit or stash them before continuing.
- Fetch the changes to the upstream repository with
git fetch upstream. -
Pull the changes into your fork, replacing
mainwith the name of the branch you are updating:git pull upstream main -
Push the changes to your fork repository on the server (GitLab.com or self-managed).
git push origin main
With repository mirroring
A fork can be configured as a mirror of the upstream if all these conditions are met:
- Your subscription is or a higher tier.
- You create all changes in branches (not
main). - You do not work on merge requests for confidential issues,
which requires changes to
main.
Repository mirroring keeps your fork synced with the original repository.
This method updates your fork once per hour, with no manual git pull required.
For instructions, read Configure pull mirroring.
Merging upstream
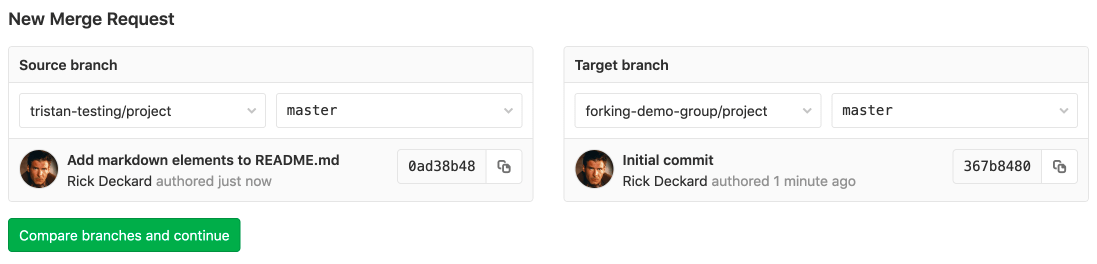
When you are ready to send your code back to the upstream project, create a merge request. For Source branch, choose your forked project’s branch. For Target branch, choose the original project’s branch.
Then you can add labels, a milestone, and assign the merge request to someone who can review your changes. Then select Submit merge request to conclude the process. When successfully merged, your changes are added to the repository and branch you’re merging into.
Removing a fork relationship
You can unlink your fork from its upstream project in the advanced settings.
Related topics
- GitLab blog post: How to keep your fork up to date with its origin.
- GitLab community forum: Refreshing a fork.